How to Prep Your Engine Compartment for Paint

I thought I’d talk a little about the restoration of your engine compartment, since it is one of the problem areas in a lot of car restoration projects, the first thing that you usually notice, it’s the the engine compartment so it’s full of grease, and of course an engine, so the first thing that you need to do is pull the engine out of the car, it’s a lot easier to pull the transmission with the engine, and pull them as a single unit. It’s good to do it yourself by means protecting your car paint but you will experience struggle so why not leave it with car paint protection Sydney guys.

You’ll notice once you do this, that it’s a lot greasier then you thought, but now you can at least get to it to clean it up, first I’d take a steam cleaner to it, and see how much of the grease and years of dirt an road grime that will take off, and don’t be thinking that this will be fast, once you can see that the steam cleaner is not getting any more of the grime out of the engine compartment, go ahead and put some degreaser on the areas that are still bad, and give the degreaser about 30 minutes to loosen up the grime.

After that, you guessed it, it’s back to steam cleaning again, what this doesn’t get, you’ll be scraping off, so be prepared to get dirty, now there is always dirt and road grime that the steam cleaner will not remove, unless the person who owned the car before you was vary in love with his car, and cleaned the engine compartment regularly, this will without a doubt make a big difference in what you have to do to get it clean, once your through scarping all of the grime off, you can break out that steam cleaner again, and give it one last shot.

After that you’ll need to take some acetone, or something like it and do your final clean up of the engine compartment, you’ll know it’s clean when you don’t see any more black on you cleaning rags, once you get to this point, it’s time to determine what needs to be fixed in the engine compartment before you can start prepping it for paint, look around for any rust, or dents that need to be fixed, you’ll know the rust by how it looks, rust will show up as bubbles in the paint, pits in the paint, or just big ugly holes, now if you see some bubbles in the paint in you engines compartment, first scrape the top of them off, and then check to see how bad the rust is by “Lightly” tapping the rusted area with a pick hammer, if the hammer puts a hole in you engine compartment, you’ll know that the rust was to an advanced stage, and you’ll need to repair it before you can go any farther on your project.

To repair that rust hole, or any rust hole, you’ll need to determine how large the effected area is, and I suggest that you draw a line around the area, after you do that, you’ll need to be sure that you have a die grinder with a cutting blade installed on it, what you’ll do now is plug your die grinder in to the air chuck, and then follow the line that you drew around the rusted area, and do yourself a favor, and cut a little at a time, make one pass over the line that you drew, just to give yourself a guide for the die grinder, all you’ll be doing here is passing your die grinder over the guide lines that you created until the rusted area is cut out of the engine compartment, now you should de-bur the area that you cut out.

After you get the area all cleaned up, take some two inch masking tape and put it across the hole, and then take a sharpie and follow the outline of the hole, pull it off of the hole and put it on the piece of sheet metal that your going to use to fix the hole in your engine compartment, take your die grinder and work around the line until you’ve cut out a piece of metal in the shape of the rust hole in your engine compartment, by now you can see where I’m going with this whole idea, OK now take that piece of metal and fit it in the hole in your engine compartment, now that you’ve got it all fit in place, it’s time to find a way to make it stay there while you weld it in, I usually use Visegrips to do this, but how you hold it in place is all up to you, you will want to make sure that it sits in place as level as possible, it will be a lot less work to finish the job if you do this, when you begin to weld the plate in place, your not going to run a solid bead around it all at one time, it will be a solid bead in the end, but work from one side to the other, and do about a one inch weld at a time, otherwise you’ll warp the metal, and cause a lot more work for yourself , so when you start, you’ll have a one inch inch bead on all four sides holding the metal in place.

Once you have made a solid weld bead around the entire patch panel, you can once again get your die grinder out, and this time put a grinding blade on it, and grind the wed bead flat, once the is done, take a dual action sander, or “DA” and put some 180 grit sand paper on it, and smooth out the rough areas in the paint, that the die grinder made, and the rough up the bare area again with some 80 grit paper, after that is done get out your mixing board, and metal glaze and mix up some metal glaze and spread it over the patched area, and then sand it with 80 grit paper on a hand block, and if needed, repeat this process again until the area is smooth and just a little high, and then load that block with 180 grit paper and level out the high spot.

Now you’ll need to primer the area that you just repaired, I would use a urethane primer for this, the brand is up to you, depending on the brand, mixing instructions will change, so be sure to ask you paint supply house to explain to you how to mix the brand that you choose, the one thing that doesn’t change in the flash time between coats, this should be about 15-20 minutes, and you should lay at least 3-4 medium wet coats of primer on the repaired area, after you get this done, you’ll want to spray a guide coat on the primer, so when you begin to sand the primer, you can see that high or low spots in your repair work, and usually you’ll have one, the other, or both, now that you have your guide coat on the primer, and the primer has had time to dry, I would give it no less then four hours to dry, but even better yet 12-24 hours of dry time. Now that it’s dry, load that hand block with 180 grit paper and sand the guide coat off, you’ll notice that their are high or low spots in your work, you’ll need to determine if primer will fill it, or if you need more glaze to be applied to your work area.

For now let’s say that your work was smooth and right the first time, so now your done fixing the rusted area, you’ll need to get a a bucket and put some warm water in it, and this will be your wet sanding bucket, and a water spray bottle is nice to have also, now you’ll need 600 grit wet sand paper to sand you engine compartment, this is of course if the rest of the engine compartment is free of dent, dings, and nicks in the paint, once you know that it is you can sand the entire engine compartment with wet 600 grit sand paper, and the areas that you can’t reach wit that, you can use a gray scotch brite pad, once the entire engine compartment is dull, you can then use a prep cleaning solvent to clean it up, and make sure that you get all of the residue from wet sanding out of the engine compartment.

Your now ready to spay the paint, know more that after you mask the rest of the car off, so you don’t get paint where you don’t want it.

Well cover that painting of the engine compartment in the next article.

I’ve been in the automotive business for about 20 or 25 years, I have worked in all facets of the industry, from parts to restoration, all different makes and models, I just want to keep people interested in the old cars because it’s where my heart is.

[http://autorevival.com]

ZL1 Corvette Registry [http://supercaregistry.info]

How to restore your car [http://autorevival.com]

Article Source: http://EzineArticles.com/expert/David_Atkin/19638
Make Sure Your Mobile Auto Detailing Service Can Meet Customer Needs

While there may be alternative methods of finishing, buffing and polishing are two processes that are tough to duplicate with other methods and I guess that is by using a buffing machine. Starting a mobile auto detailing service can be a smart addition for any detailing business. This is a service that addresses a real need that exists among many car and truck owners. Most people would love to bring their vehicles in for regular detailing. After all, this kind of car and truck servicing not only makes their vehicles look good, but helps vehicles last longer as well. You will discover that while the entire body of the car and other parts of the interior are still very new and neat, the leather seat of the car will look a bit dirty and worn out. So that’s the time you will use our leather care product.

Unfortunately, many people simply do not have the time to bring their vehicle in for detailing. Even on the weekends, when they don’t need to bring the car in to work, people often need their vehicles to do other errands. This is why many people keep putting off the task of bringing their car in for detailing. The best way to deal with this situation is to bring the detailing to the customer.

The Right Stuff

While starting a mobile auto detailing service is certainly a good business decision, it does require an investment in the right kind of machines. It’s important to note that doing detailing jobs on-site means that you can use many commercial and even industrial-grade machines for effective cleaning. Servicing premises will have ample facilities to deal with water run-off and excess water consumption. The situation is very different when you do a detailing job at a customer’s residence. Not only do you need to be careful about excessive water consumption, you also must ensure that the detailing job doesn’t lead to excessive water drainage. Residential areas are often not equipped to deal with high levels of water drainage.

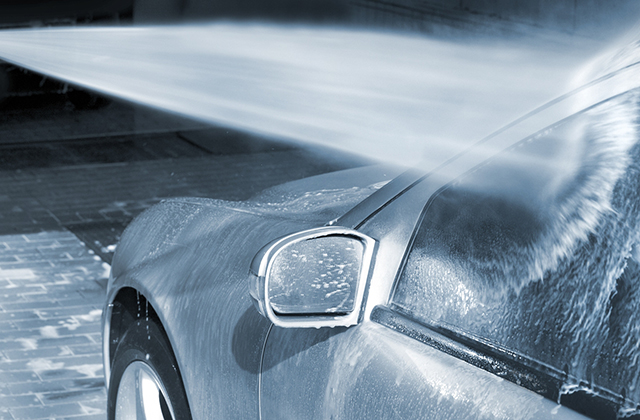
The best way to deal with these issues is to invest in the right kind of machines for your mobile auto detailing business. For cleaning exteriors, ensure that you buy pressure washing units with pressure levels of 1500 psi or less. This will ensure optimum cleaning power that doesn’t damage the paint or body job of the vehicle. It’s also important to use systems that have water flow rates of 0.5 GPM. This offers cleaning power that doesn’t harm the vehicle surface and cuts down on excess water drainage as well.

Inside And Outside

Mobile auto detailing requires more than just exterior cleaning. It’s also important to invest in the right kind of mobile car wash equipment for vehicle interiors as well. For cleaning carpets and upholstery, it’s best to use car wash machines and carpet cleaners that use less water and more suction and extraction power for cleaning. These kinds of car wash products are ideal as they allow the interiors to dry out in just a matter of hours. This can be extremely beneficial if you are working on a deadline. The low water usage also means the interiors will dry out completely and know more there will be a reduced risk of germs growing in the damp material.

It’s clear that a mobile auto detailing service is a great way to deliver a service that many customers would really find beneficial. It is vital to invest in the right mobile car wash equipment for the job. Using eco-friendly car wash products as well as car wash machines with low water consumption can be very beneficial to your detailing business. Read more about our car detailing tips.

A Few Words About Detailing

Automobile detailing

A clean automobile is a delight to watch because dirty and dusty cars take the spirit out of going anywhere. Moreover with people spending more time in their cars rather their homes, automobiles become an extended home. Therefore keeping it clean not just from the exterior but the interiors as well is what makes the difference. Auto detailing is the process of thorough cleaning of the automobile along with complete polishing and waxing. The process of detailing initiates cleaning thoroughly not only from the outside but from the inside too. This practice of auto detailing is done not only for personal satisfaction but can be used to prepare the automobile for car shows or to increase its value if resale is intended. Swirl marks or spider webbing are the two most common defects found on cars and especially black paintwork but good news we get rid of it using best car polish.

Professional detailers have the requisite knowledge and expertise to carry on the job of auto detailing. They take it as a work of “science and art”. The detailing on scientific grounds includes elements like equipments, chemicals, complete information and knowledge of the surface of vehicles, standards followed by the industry and most importantly the requirements of the customer. The artistic aspect of detailing includes the activities involved in the combination of the above mentioned elements into specific procedures that work according to each situation. Successful completion of the activities produces quality service and a satisfied customer and this is what professional auto detailer aim for.

As mentioned auto detailing is more than just washing and waxing and complete detailing comes by working both on the exterior as well as the interiors.

Exterior detailing:

The exterior detailing of an automobile involves cleaning the car thoroughly from the outside and bringing a shine to its paint, wheel, chrome trim, windows and the tires as well. There are many products that are used for the exterior detailing. These include detail clay, detergents, waxes, polishes and a host of other applicators. The first step towards exterior detailing involves washing the excess dirt and dust that has settled on the automobile. One must start with the wheels and the rims of the brake and then move upwards.

The process of exterior detailing involves cleaning, correcting the surface and protecting. Cleaning removes the foreign elements that settle on the surface by washing and detailing. The dirt and pollutants that settle on the clear coat of the surface of the automobile cannot be removed by normal washing. A clay bar can thus be used to remove this dirt. When still wet after the final rinse, a light spray of the quick liquid wax can be applied to the surface. The correcting process involves polishing the surface either by hand or by machine. Polishing pads specifically made for the purpose are useful for removing fine scratches produced by improper drying or washing techniques. Protecting is the last stage where protective material is applied to the surface to prevent foreign particles to adhere to its surface. This barrier is thus provided by sealants and waxes. Light buffing with the wax off towel is the best way to remove any water spots that might have stayed back. The painted surface thus gets a depth and there is nothing else but a great shine.

Before the entire process of exterior detailing is complete, it is good if the horizontal panels like the trunk, hood and the roof are clayed. Although the process takes just a few minutes extra, its impact is much more, as the smoothness that it leaves would have the customer delighted.

Interior Detailing:

The second part of detailing involves interior detailing where the interiors of the automobile are cleaned thoroughly to bring it as close to the original condition as possible. This is done by vacuuming the car first or steam cleaning. This might be done by removing the car seats. Stains on the covers and upholstery also have to be removed. Various products like rug shampoos, upholstery foam or spot cleaners can be used depending on the vehicle’s interior conditions. Most of the dust stains and dirt are removed by interior detailing. Except the physical damage all stains are removed by the process.

The next area to be cleaned is the windows of the automobile. After thorough cleaning with the cleaners, the windows must be sprayed with a rain repellent that does not let the rain water stay on the window but makes it slip.

The areas such as the door panel rim, the dashboard and the console are of vinyl and therefore needed to be cleaned first. Conditioners are then used to treat the vinyl to make it pliable. Scratches from the speedometer face are removed and polished to make it shine. It is essential to remember that the foot pedals and the steering wheel covers must not be conditioned as this would make them slip.

The heater and air conditioner vents are also included when interior detailing is carried on. They are generally cleaned by the usage of Q-tips. The dust and dirt that collects in the console seams are also removed using the same technique. The glass is thoroughly cleaned off any scratches or films both from the exterior as well as the interior to provide a clear vision.

Engine bay cleaning:

Professional detailers provide another form of automobile detailing in the form of engine detailing. This involves cleaning the engine and its various parts thoroughly by steam, degreasers, high pressure water and other cleaners. However when cleaning the engine it is essential that the electrical or computer modules are kept away from water. Therefore it is best to clean the engine with a towel. Also the engine must be cleaned before washing the automobile as any dust or grease from the area that might settle outside can be later cleaned during exterior detailing.

Here it is important to note that the process of detailing does not include any body work, upholstery repairs or mechanical repairs. It is thus the process of cleaning the automobile thoroughly to give it a presentable look and enhance its longevity.

Car detailing can either be carried out by oneself by making use of detailing kits or can be done by professional detailing companies. However as auto detailing is time consuming it is expensive when compared to normal washing and cleaning the vehicle. But as this is a good way to bring the automobile close to its original condition, it is worth the effort and the cost. Know more that normal washing of your car will not bring back the detail of your car.

Detailing Community – [http://www.detailing-community.com]

Article Source: http://EzineArticles.com/expert/Stelian_Stefan/604829

Article Source: http://EzineArticles.com/4048712